Ardan’s Blog Talk is going mobile and needs your support please check it out and send a comment. The mobile web comes with a different set of browser problems that are similar but worse than the real web. Cross browser differences are more significant, if you see a problem in your mobile web browser please let me know.
If anyone is interested in developing their blog on the mobile web and would like to discuss how I have done it, feel free to ask question or offer suggestions.
Visit the mobile site via http://themoblog.com from your mobile phone.

Monday, September 6, 2010
Monday, August 2, 2010
Subscript/Superscript
this is superscript Superscript/Subscript this is subscript
This blog is the copyright of Ardansblogtalk©
This is just some of the things that can be done with subscript and superscript.
So how did I get the little © ?
Then to have it as superscript or subscript it is
Ardansblogtalk©<sup>©</sup>
or
Ardansblogtalk©<sub>©</sub>
This blog is the copyright of Ardansblogtalk©
This is just some of the things that can be done with subscript and superscript.
So how did I get the little © ?
| Symbol | HTML code |
|---|---|
| © | © |
| ® | ® |
| @ | @ |
| ™ | ™ |
Then to have it as superscript or subscript it is
Ardansblogtalk©<sup>©</sup>
or
Ardansblogtalk©<sub>©</sub>
Wednesday, July 7, 2010
Table Zebra Rows
| Name: | Country: | Hobbies: |
|---|---|---|
| Ardan | Australia | bike riding, reading |
| Peter | Australia | reading, blogging |
| John | England | soccer, boxing |
| Tracey | South Africa | soccer, blogging |
Code with comments
This can be copied and pasted into the Edit HTML<table>
<tr>
<th>Name:</th><!-- th:table head -->
<th>Country:</th>
<th>Hobbies:</th>
</tr>
<tr class="bg"><!-- I have given every other row a class so as to style them different-->
<td>Ardan</td>
<td>Australia</td>
<td>bike riding, reading</td>
</tr>
<tr>
<td>Peter</td>
<td>Australia</td>
<td>reading, blogging</td>
</tr>
<tr class="bg">
<td>John</td>
<td>England</td>
<td>soccer, boxing</td>
</tr>
<tr>
<td>Tracey</td>
<td>South Africa</td>
<td>soccer, blogging</td>
</tr>
</table>
<h4>Code with comments</h4>
<style>
table{width:500px;/* width can be changed but limited by page width or working area*/
border:1px solid grey;}/* change #of pixels to what you want, borders can be solid,dashed or dotted, colors can be changed */
td{border:1px solid grey;
padding: .5em 1em .5em 1em;}
th{border:1px solid grey;
padding: .5em 1em .5em 1em;
background-color: lightgrey;}
.bg{background-color: pink;/* .bg identifies it as the class bg */
color: red}
</style>
Saturday, July 3, 2010
Letter Spacing
Tight Spacing
Loose Spacing
Below is the code used to achieve this, I hope it helps.<h2 id ="tight">
Tight Spacing</h2>
<h2 id ="loose">
Loose Spacing</h2>
<style>
#tight{letter-spacing:-2px;}
#loose{letter-spacing:10px;}
</style>
Saturday, May 22, 2010
Transparent Box
Check out the companion site for the code.
http://ardanswebdesign.com/trans.html
http://ardanswebdesign.com/trans.html
A transparent box can be used for a photos caption.
Friday, May 21, 2010
Code for Tooltip
The code used for the tooltips can now be found here just cut and paste.
http://ardanswebdesign.com/tooltip.html
Read the comments near the Blogger logo.
Any problems post comments below.
http://ardanswebdesign.com/tooltip.html
Read the comments near the Blogger logo.
Any problems post comments below.
Companion Site
Hi, Sorry I have been away for a while. Sometimes it is very frustrating to describe what I am trying to achieve here with the limitations of Blogger, therefore I have created a companion site to work in with this Blog.
At the moment I do not have any tutorials there, however now that I have it wish to build on it and this blog in conjunction with each other.
Please visit the site from time to time and feel free to comment here about it.
The site is Ardan's Web Design
At the moment I do not have any tutorials there, however now that I have it wish to build on it and this blog in conjunction with each other.
Please visit the site from time to time and feel free to comment here about it.
The site is Ardan's Web Design
Sunday, April 11, 2010
Tool Tips Revisited and Div with Shadow
Just testing a tooltip and a div with shadowThe shadow for the div is created by the browser, it is not a image effect, however could look nice around images.
 .This is just a test if it works correctly will follow with a tutorial.
.This is just a test if it works correctly will follow with a tutorial. This div has a colored background and the shadow is created by the browser.
This would maybe look nice around an image.
This would maybe look nice around an image.
Wednesday, March 17, 2010
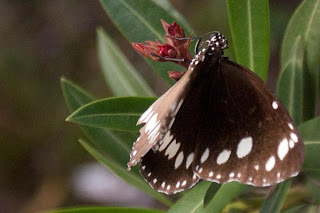
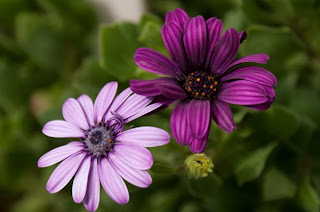
Thumbnails
The question is, is this better done as a table or with pure CSS?
Maybe easier with a table, although thumbnails shown don't open to a larger picture,
in a new window this would be easy enough to do.


Maybe easier with a table, although thumbnails shown don't open to a larger picture,
in a new window this would be easy enough to do.
Photo of baby spider.
Photo of a butterfly.
Just flowers.
The Australian Kangaroo
Saturday, March 13, 2010
Two column post in Blogger: The Video
 Creating a two column post may be of some use to you so this post shows how to do it. The video also shows how to add
 two small images to either side of one column. The problem I had with the first post was with FireFox so it took a while to
sort it out. The HTML involves placing two div’s inside another I have called them ‘inside1’ and ‘inside2’ and placed these

two div’s inside one called outer. To edit text afterwards you need to do it in Edit Html for some reason it will not let you
in compose
The two images are placed by telling them to float either left or right. The second one can go anywhere but it is better to
place it inside the text rather than at the end. The style sheet widths can be changed however the 2 inside div’s should
total less than the outer allowing also for the padding. If your columns do not sit properly then change these numbers.
To save time with the video I cut and paste the code if you would like a copy of the text file Download Here. If you need help post a comment.
Friday, March 12, 2010
Two column post in Blogger.
 Have you ever wanted to make your post length shorter or maybe just wish you could have two columns? This post will show you how to achieve it
 and also add a graphic to one column, then again why not two graphics within a column but on different sides of the column.
 Just a note about Ardan’s virtual ipod so far not many people have voted. It seems the concept of a blog character may not be a good one. May leave it for a while and re-introduce it at a later time. I will make a video on how to do this.
Monday, March 8, 2010
Vote for Ardan to get his virtual ipod
 Hi all,
 Me again, well dad has completed what he thinks looks like me. Truth being it looks nothing like me, I’m quite good looking. Anyways dad said when I talk my text has to be red that way you know when it’s me or him.
I asked dad to make me a virtual girl friend if I’m gonna have to stand around here and he said no. Dad’s a bit old fashion and doesn’t understand the needs of a boy my age. Like I’m a real life avatar girls are going to go crazy over me.
For now I wish I just had my music to listen to, so can you vote on the poll on the right hand side of the screen so dad will get me a virtual ipod. Please!
Sunday, March 7, 2010
Ardan Comes Alive
Hello World,
My dad created this blog and named it after me.
My name is Ardan and you gotta say I’m cute eh!
My dad wants to introduce a character into his blog, so he thought he would introduce you to me.
Today he started turning me into some sort of cartoon type character, I hope you like it.
I personally can’t wait to get the rest of my body.
Anyways now I’m here please say hello via the comments, if ya don’t want to talk to my dad, and I can understand why then just talk to me.
For now I will say goodbye, but have no hands to wave so it’s just a sad ass bye!
 |  |
Thursday, March 4, 2010
Image to sketch then reflect in Photoshop

- When area is selected with the wand press delete to remove background
- If different colors use the pen tool to trace and select.
- When using the Guassian Blur filter change slider to what you like.
- The rectangle i draw around the image then change layers is set to my blogs background color
- Experiment with settings maybe giving a drop shadow would look nice
CSS Background Properties.
Background Color
The background-color property specifies the background color of an element.
The background color of a page is defined in the body selector:
Examples
background-color:#b0c4de;
background-color:red
Background Image
The background-image property specifies an image to use as the background of an element.
By default, the image is repeated so it covers the entire element.
The background image for a page can be set like this:
background-image:url('paper.gif')
Background Image - Repeat Horizontally or Vertically
By default, the background-image property repeats an image both horizontally and vertically.
Some images should be repeated only horizontally or vertically, or they will look strange, like this:
background-image:url('gradient2.png');
background-repeat:repeat-x;
Background Image - Set position and no-repeat
Remark When using a background image, use an image that does not disturb the text.
Showing the image only once is specified by the background-repeat property:
background-image:url('img_tree.png');
background-repeat:no-repeat;
Background - Shorthand property
As you can see from the examples above, there are many properties to consider when dealing with backgrounds.
To shorten the code, it is also possible to specify all the properties in one single property. This is called a shorthand property.
The shorthand property for background is simply "background":
background:#ffffff url('img_tree.png') no-repeat top right;
When using the shorthand property the order of the property values are:
* background-color
* background-image
* background-repeat
* background-attachment
* background-position
It does not matter if one of the property values are missing,
as long as the ones that are present are in this order.
From w3schools.com
Therefore to get the yoga girl code mine was
background: url("image url") no-repeat bottom right;
The background-color property specifies the background color of an element.
The background color of a page is defined in the body selector:
Examples
background-color:#b0c4de;
background-color:red
Background Image
The background-image property specifies an image to use as the background of an element.
By default, the image is repeated so it covers the entire element.
The background image for a page can be set like this:
background-image:url('paper.gif')
Background Image - Repeat Horizontally or Vertically
By default, the background-image property repeats an image both horizontally and vertically.
Some images should be repeated only horizontally or vertically, or they will look strange, like this:
background-image:url('gradient2.png');
background-repeat:repeat-x;
Background Image - Set position and no-repeat
Remark When using a background image, use an image that does not disturb the text.
Showing the image only once is specified by the background-repeat property:
background-image:url('img_tree.png');
background-repeat:no-repeat;
Background - Shorthand property
As you can see from the examples above, there are many properties to consider when dealing with backgrounds.
To shorten the code, it is also possible to specify all the properties in one single property. This is called a shorthand property.
The shorthand property for background is simply "background":
background:#ffffff url('img_tree.png') no-repeat top right;
When using the shorthand property the order of the property values are:
* background-color
* background-image
* background-repeat
* background-attachment
* background-position
It does not matter if one of the property values are missing,
as long as the ones that are present are in this order.
From w3schools.com
Therefore to get the yoga girl code mine was
Ah! But can you use it to frame a post?
Yes you can,
however a little bit harder.
Now you just use background
Not background-image.
Which points out a fault in the video.
Firstly why did it work? Because I wanted it to repeat in both directions so background-image was ok, however to give further detail as in this case not wanting the image to repeat it is just the background tag.
Background Image to a Post.
It can be nice to sometimes give a background image or texture
for a post. This tutorial will show you how to go about setting it up.
I am using a 200px square image though you can make it smaller
If you wish. Once you have the image you style the HTML to
repeat the image in either direction. So you can repeat either x or y
depending on which way you want it. not putting a repeat direction
Will repeat it by default in both directions.
If you don’t want it to repeat then type no-repeat, the code is
background-image the url (in brackets) and repeat x or y or no-repeat.
Wednesday, March 3, 2010
Unordered List Images
Changing the unordered list dot to an image.

- one
- two
- three
- one
- two
- three
- First create the image save it to about 15px X 15px
- Next upload it to a new post (don't publish it)
- Get the image information
- Next edit the HTML
- Give the ul an Id
- Then style the ul like below.
- There you have it no more sad dots.

Monday, March 1, 2010
Blog Type with animated gif

Ok so blogger does not allow an animated gif, this needs a work around.
Ok got the work around but this needs to be easier.
Saturday, February 27, 2010
Do you need help?
Ardan’s Blog Talk needs some ideas for what to include here.
Have you ever wondered if it was possible to do something
in Blogger? Not sure if it can be done. Post a comment here and
We will see if it is possible or if there is a work around for it.
Have you ever wondered if it was possible to do something
in Blogger? Not sure if it can be done. Post a comment here and
We will see if it is possible or if there is a work around for it.
Friday, February 26, 2010
Showing a blog within a post: Part 2
If anyone is interested the blog inside a post from the previous post
was done using an iframe easy enough, however it has a problem.
The iframe has a zoom setting which works in some browsers and
not others so although it can be done it does not look
the same in Internet Explore and Firefox.
Firefox does not seem to support the zoom setting.
To see what I am talking about you need to look at it in both browsers.
It does not look too bad though if your main content is to one side
of the blog and you set the width of the iframe to show it.
If anyone would like to see the code that achieved this,
leave a comment otherwise there is not much use in me showing it.
Wednesday, February 24, 2010
Showing a blog within a post: Example
Hi all,
Ever wanted to promote another blog, maybe your own or someone elses.
Easy enough to take a screen dumpand have a stactic picture, wouldn't
it be great though if you could show the actual blog?
Still working on this. Need to change zoom, maybe a problem with browsers.
Ever wanted to promote another blog, maybe your own or someone elses.
Easy enough to take a screen dumpand have a stactic picture, wouldn't
it be great though if you could show the actual blog?
Still working on this. Need to change zoom, maybe a problem with browsers.
Wednesday, February 17, 2010
Part 4 Custom Menu Blogger
Now for the final part of the tutorial.
other than a reserved html or css word. myMenu will be safe.
top:50px; tells the browser to drop it down 50 pixels from the top,
this could also be a percentage say 2% or whatever.
left:380px; tells the browser to place the menu 380 pixels
in from the left hand side of the screen. May also be a percentage.
Don't forget to put this all inside curly braces(next to the 'P' on the keyboard.


- Once you have as many links as required, place them in a 'div'.
other than a reserved html or css word. myMenu will be safe.
- Don't forget to close the div which is the second highlighted bit.
- Now for the style highlighted red.
top:50px; tells the browser to drop it down 50 pixels from the top,
this could also be a percentage say 2% or whatever.
left:380px; tells the browser to place the menu 380 pixels
in from the left hand side of the screen. May also be a percentage.
Don't forget to put this all inside curly braces(next to the 'P' on the keyboard.

- You are better off making all your code up in notepad then copy and pasting it into a new gadget.
- Use the HTML/ Javascript gadget by clicking add a gadget in your blogs layout window.
- Save and test.
- The numbers used for top and left may need to be changed to see where it looks best.
- Check in as many browsers as you can. Firefox and Internet Explorer will display it differently.
- Good luck. Post a comment if you need help. There are ways to have it display the same in both browsers however a little more detailed.

Monday, February 15, 2010
Part 3 Custom Menu Blogger
Now to create the pages


- Pages are basically just one long post.
- Once you have created the post open it in its own window by clicking the post heading
- Now copy and paste the URL into the text document you created in part 2.
The URL in this case could be to any however, I am doing tutorial mainly for your own blog/s.
- This is what I have in my text document for 1 image + 1URL

- Next remove the parts highlighted red. The image part is what we need.

- Next combine the URL and Image tag to get the link.
- Adding what I have added in blue highlight.

Saturday, February 13, 2010
Part 2 Custom Menu Blogger
- Create a new post
- Upload the button images to the post
- Do not publish this post , it only ever needs to be a draft
- These are the 3 images I have used

- Click on Edit HTML
- Now you will see the HTML code for the 3 buttons
each image.

- Copy and Paste your code into a text editor
Office Word. Word adds its own formatting you don't need.
- Save the text document for later use.
- Next steps coming soon in Part 3
Part 1 Custom Menu Blogger :Create Buttons
Buttons created in Photoshop however any image editing program
can be used to make your own buttons.
can be used to make your own buttons.
Friday, February 12, 2010
Custom Menu for Blogger
Today I have created a custom menu for my blog, the red buttons at the top of the page.
Colors could maybe be a little better. However I, will change them soon as I do the tutorial.
It seems to work ok; therefore I will start a tutorial in parts, because there are quite a few steps in it.
Colors could maybe be a little better. However I, will change them soon as I do the tutorial.
It seems to work ok; therefore I will start a tutorial in parts, because there are quite a few steps in it.
Tuesday, February 9, 2010


Horizontal Lines
Horizontal rule, is the tag given to them by W3C (World Wide Web Consortium) the body which governs web standards. They are simple to use however once again be careful using them due to cross browser compatibility or should I say incompatibility. Another alternative again is to do it with a graphic.

The graphic used here can be copied and pasted down the page in as many places as you require it. Question is could you copy my one and paste it? The answer is sadly no, not due to any copyright law etc, it is that mine has had its matte color set to blend in with my background.
Therefore on a black background it would have a white border as below.
In that case you would need this one, which now does not look good.

With this being the proper result you had wished for.

The graphic used here can be copied and pasted down the page in as many places as you require it. Question is could you copy my one and paste it? The answer is sadly no, not due to any copyright law etc, it is that mine has had its matte color set to blend in with my background.
In that case you would need this one, which now does not look good.

With this being the proper result you had wished for.
Monday, February 8, 2010
Blog SEO Myth or reality?
Search Engine Optimization:
There are many blogs and websites that will offer you what they call sound information on search engine optimization. As far as I can see, there is no quick formula. It is a very long and frustrating process that never seems to end.
One comment I will offer though is it seems to be easier with a blog than a website. As a web designer I have created many websites, only to find all advice of SEO, although thorough does not work. Many sites will offer to do it all for you. However, they walk a very thin line between getting your site to number one in the search engines and having it banned.
Weaved into many pages is key words that are mentioned hundreds if not thousands of times on a single page. This is done in many cases by making the text the same colour as the background. This, furthermore, if detected by Google is classed as keyword stuffing or spamming and will have you removed from the search engine, if lucky you may be able to resubmit the site or page again after a period of suspension.
Links are written about in many articles, mentioned are both in-links and out-links. All of this sounds nice, if achievable though in many cases apart from spamming people begging them for a link exchange it is better to write worthwhile content and hope people pick up on your article and link to it.
Submitting your blog to search engines may work, once they are eventually listed, some search engines are better than others.
Google is quite quick to list blogs, especially if they are done with their free service Blogger. Google though is slower in listing most websites, with a month or two if not longer. Generally having a site made with the open source content management system Joomla will list quickly and will only start to slip down the search engine listing as you implement different SEO advice, modules and components.
Yahoo is ridiculously slow in listing anything, web sites taking anywhere from 6 weeks to 3 months.
Of the two Google would be the better to be listed on, some advice will say once you are listed on Google, Yahoo will also list you. I have not seen this in any of my dealings.
BlogCatalog, takes approximately 4 days to approve your blog, and if it is not approved they will give you a reason. In many cases, this may be a new blog, and they will say the blog does not yet have enough content. Once approved by BlogCatalog, Google seems quick to list posts in its search queries.
Technorati promotes themselves as the number one place to have your blog listed the crem de la crem of blog listings, so they would have you believe. Recently, they seem to be more like the painstaking experience you get with Yahoo.
In concluding this article the only sound advice I can give is be true to yourself and your readers. Take the time initially write worthwhile content, like said the baseball movie field of dreams ‘if you build it, they will come’ in the movie it is in reference to a baseball field, in blogging though I would say it applies to the content not the blog. Build on your quality of content, almost anyone can create a blog.
Earn your in-links by content not cheating people or buying them.
With Blogging remember readers first, and then come the results!
Ink Drop
The ink drop was just a test to see if it could be done in Blogger.
This was done in Flash however it could almost certainly be done as an animated gif.
Might be a good subject for a video tutorial.
This was done in Flash however it could almost certainly be done as an animated gif.
Might be a good subject for a video tutorial.
Saturday, February 6, 2010
Border: Video Tutorial
This tutorial shows how to place the border in HTML and CSS,
shown with Notepad++ a free program and shows effects in browser.
The tutorial then shows which part of the code to copy and paste into Blogger.
I hope you find it useful.
Lorem ipsum dolor sit amet, consectetur adipiscing elit. Vestibulum porta placerat nisl, non iaculis arcu semper quis. Morbi quis nunc turpis. Vivamus egestas blandit felis eu interdum. Ut porttitor commodo ligula sit amet feugiat. Nam at nisi dolor, vitae egestas nulla. Phasellus vel erat tellus, et vestibulum est. Cras dapibus facilisis lacus faucibus pretium. Integer facilisis fermentum lorem id
Friday, February 5, 2010
Creating Tooltip Popups in Blogger: Part 2
Download text file here
Important note:
Use this script in Edit HTML only.
If you use it in the blog Compose mode Blogger adds some code.
The last part of the video will show you what happens if you do.
Creating Tooltip Popups in Blogger: Part 1
Sometimes it may be nice to have a popup Tooltip. These are common in Javascript, this is done however without using any Javascript.
The next couple of posts will show you though, how to create them using CSSCascading Style Sheet only.
Note the tooltips shown here are for display purposes only, none of them contain ads.
The next couple of posts will show you though, how to create them using CSSCascading Style Sheet only.
Note the tooltips shown here are for display purposes only, none of them contain ads.
Thursday, February 4, 2010
Drop Capitals in Blogger

The problem however, is that although you may be able to
set the style sheet to show it, the text may not appear the
same on all browsers. This lack of consistency across browsers
is a problem web designer’s deal with regularly.

cursive fonts, is to use an image as I have done here.
Although it may be time consuming, it may be just what your blog
needs to give it that special touch.
A dropped capital letter works in well, say with a poetry blog.

follows away from the image. This is done by the default
style settings. The image padding is set to 1em, in order
for our text to look nice we need to reduce this.
This paragraphy I have left at it's default. As you can see
the paragraph does not look as nice as the previous two.
 oving the text closer is achieved by editing the images html settings.
This is the default code for the letter ‘m’.
style="clear: left; float: left; margin-bottom: 1em; margin-right: 1em;
Em's can have a value, such as 0.1em, and even a negative value such as -0,2em.
I hope you may find this information useful!
Content edit
You can edit this post!
Top Five Blogs On The Web
- one
- two
- http://ardansblogtalk.blogspot.com/
Changes will not remain when page is refreshed!
Wednesday, February 3, 2010
Test post used for video tutorial
| My Fitness Journal | |
|---|---|
| Monday | Walked 10 kilometers. |
| Tuesday | Paddled 20 laps of the pool. |
| Wednesday |  |
Adding a table to a Blogger post
| My Fitness Journal | |
|---|---|
| Monday | |
| Tuesday | |
| Wednesday |  |
This is the code:
<table>
<thead>
<tr>
<th colspan="2">My Fitness Journal</th>
</tr>
</thead>
<tbody>
<tr>
<td>Monday </td> <td><del>Ran</del><ins>Walked</ins> 10 kilometers.</td>
</tr>
<tr>
<td>Tuesday</td> <td><del>Swam</del><ins>Paddled</ins> 20 laps of the pool.</td>
</tr>
<tr>
<td>This is where the image date was pasted
</td>
</tr>
</tbody>
 </table>
<style>
td
{
padding:1em;
border: 1px solid blue;
}
table
{
border:2px solid red;
}
</style>
Monday, February 1, 2010
Placing Text Near Image: Video Tutorial
Notes:
The first thing needed is to place the text inside an element,
in this case I placed it within a paragraph tag <p>
and gave the p an id, in this case 'move'.
The name here can be almost anything, just remember it, if code is longer.
The p tag needs to be closed and must encompass all the text you wish to move.
The positioning is then done within the style tags with CSS,
explained in an earlier tutorial on this blog.
As seen in the video positioning can be a bit of a hit or miss
and you may require changing it a couple of times.
Problems to watch out for:
In changing the paragraphs position, any further paragraphs will then appear out of place.
Work around this by giving paragraphs a class rather than an id.
Or place all paragraphs within a div tag.
The result of the tutorial is below.
#move
{
position:relative;
top:200px;
left:-60px;
}
Picture of a princess.
This is the text we wish to move closer to the image.
This is the text we wish to move closer to the image.
Sunday, January 31, 2010

How to create a GIF image with transparent background in PhotoShop: Video

How to place text next to an image Blogger

How to now get the text near the tree?
This could be a good subject for a tutorial.
Tutorial to follow soon.
This could be a good subject for a tutorial.
Tutorial to follow soon.
Saturday, January 30, 2010
Customizing Blogger templates: Part 3
Note of caution, backup your blog before editing HTML.
Ok now for the fun part, go to your Blogs layout tab and select edit html.

Next scroll down the code and find the id you wish to look at. In my case I wanted to change the width of the sidebar, which was 30%.
I hope you have enjoyed this tutorial and have found it useful. Though at this stage very basic, if I find a demand for it I will do some more in depth tutorials.
Ok now for the fun part, go to your Blogs layout tab and select edit html.

Next scroll down the code and find the id you wish to look at. In my case I wanted to change the width of the sidebar, which was 30%.

Things to remember if you change the width setting to 20% from 30%, you will also need to change the main section from 70% to 80%.
Once any change is made save it have a quick look if you don’t like it change it back.
The semi colon at the end of each line is important do not leave it out.
The semi colon at the end of each line is important do not leave it out.
Thursday, January 28, 2010
Customizing Blogger templates: Part 2
Looking at our blog we have no idea what the divisions(div’s) are called.
With Firefox loaded and the Web Developer add-on installed, we can see the Web Developer tool bar.
It looks like this.

If it is not visible go to the Tools menu at the top of the browser window and you should be able to access it from there.
Click Information on the Web Developer tool bar then Display Element Information.
You will then have a crosshair cursor and as you hover over the different page elements it will place red border around the element.
When you click the element, information about the element will be displayed in the orange box.

Now I click the white section on the right hand side of the page.


When writing HTML code div’s usually have either an id or a class. Any particular div id can only be used once per page. A class can be used more than once; this would be used say for several paragraphs on a page where you would like to give them a different formatting to other paragraphs.
Div is written as div id=”whatever” in HTML and in CSS this is written as #whatever.
A class is written as class=”something” in HTML and in CSS .something. The name with a period or dot before it.
With Firefox loaded and the Web Developer add-on installed, we can see the Web Developer tool bar.
It looks like this.
If it is not visible go to the Tools menu at the top of the browser window and you should be able to access it from there.
Click Information on the Web Developer tool bar then Display Element Information.
You will then have a crosshair cursor and as you hover over the different page elements it will place red border around the element.
When you click the element, information about the element will be displayed in the orange box.

Here you can see I have clicked on the blog heading and the box has displayed the information about it.

The information that is displayed has what I need to find that section in the CSS code.

The first line is what we are interested in here.
div #sidebar .sidebar section
Div is written as div id=”whatever” in HTML and in CSS this is written as #whatever.
A class is written as class=”something” in HTML and in CSS .something. The name with a period or dot before it.
Customizing Blogger templates: Part 1
Before we jump into editing the html for our blog let’s get some great tools.
Personally I use Firefox as it is the preferred browser of many web designers. Internet Explorer is a designer’s nightmare.
Type ‘internet explorer quirks’ into your search engine, I got 1,010,000 results.
Once you have Firefox installed, get the Web Developer add-on and install it also.
So what does it do? It makes editing your template via the html easier.
WebPages and your blog are made up basically of Hypertext Markup Language(HTML) and Cascade Style Sheets(CSS) code.
This is the html code that makes up a div, a div could be likened to a box.
<div id="main-wrapper" >
Text and Images can be added inside the box.
</div >
And this is the CSS code, this tells your browser how big the box should be and what to do with the elements inside it.
This will be explained in Part 2
Personally I use Firefox as it is the preferred browser of many web designers. Internet Explorer is a designer’s nightmare.
Type ‘internet explorer quirks’ into your search engine, I got 1,010,000 results.
Once you have Firefox installed, get the Web Developer add-on and install it also.
So what does it do? It makes editing your template via the html easier.
WebPages and your blog are made up basically of Hypertext Markup Language(HTML) and Cascade Style Sheets(CSS) code.
This is the html code that makes up a div, a div could be likened to a box.
<div id="main-wrapper" >
Text and Images can be added inside the box.
</div >
And this is the CSS code, this tells your browser how big the box should be and what to do with the elements inside it.
#main-wrapper {
  width:64%;
  float:$endSide;
  word-wrap: break-word; /* fix for long text breaking sidebar float in IE */
  overflow: hidden;     /* fix for long non-text content breaking IE sidebar float */
  }
Sometimes identifying the divs and page elements can be difficult this is where the Web Developer tool comes in handy. This will be explained in Part 2
Wednesday, January 27, 2010
Changing file size of an image in PhotoShop
Original file size was 27.8mg width 3872 pixels height 2592 pixels

By going to Image > Image size I changed the dimensions to 400 pixels wide and a height of 268 pixels.
 Change the resize measurements to suit your needs.
File size is still 314.1kb.
By saving for web devices

We can then have a final image of 17.9kb having the quality setting left at 60% and JPG.


Hope you find this helpful.

By going to Image > Image size I changed the dimensions to 400 pixels wide and a height of 268 pixels.

File size is still 314.1kb.
By saving for web devices

We can then have a final image of 17.9kb having the quality setting left at 60% and JPG.

And the final image

Hope you find this helpful.
Subscribe to:
Posts (Atom)


